


Hey there, fellow homeowners and DIY enthusiasts! As a supplier of Indoor Waterproof Paint, I've seen my fair share of paint cracking issues. It's a real bummer when you spend time and money on a fresh coat of waterproof paint, only to see it start to crack in no time. But don't worry, I'm here to share some tips on how to prevent cracking of indoor waterproof paint.
Understanding Why Paint Cracks
Before we dive into the prevention methods, it's important to understand why indoor waterproof paint cracks in the first place. There are several common reasons:
- Poor Surface Preparation: If the surface isn't properly cleaned, sanded, or primed before painting, the paint won't adhere well. This can lead to cracking as the paint tries to stick to a dirty or uneven surface.
- Temperature and Humidity: Extreme temperature changes and high humidity levels can cause the paint to expand and contract. Over time, this constant movement can lead to cracking. For example, if you paint in a very hot and dry environment and then it suddenly gets cold and humid, the paint may crack.
- Incorrect Paint Application: Applying too thick a coat of paint can cause it to dry unevenly. The outer layer may dry quickly, while the inner layer remains wet. As the inner layer dries and shrinks, it can cause the paint to crack.
Tips for Preventing Paint Cracking
1. Proper Surface Preparation
- Clean the Surface: Start by removing any dirt, dust, grease, or old paint from the surface. You can use a mild detergent and water to clean the walls or surfaces. For stubborn stains, you may need to use a stronger cleaner. Rinse the surface thoroughly and let it dry completely.
- Sand the Surface: Use sandpaper to smooth out any rough areas or bumps on the surface. This will help the paint adhere better. Make sure to sand in the direction of the grain if you're painting wood. After sanding, wipe away any dust with a clean cloth.
- Prime the Surface: Applying a primer is crucial. A good primer creates a smooth and even surface for the paint to adhere to. It also helps to seal the surface and prevent moisture from seeping in. Choose a primer that is compatible with your waterproof paint. For example, if you're using a Polymer Bitumen Membrane, make sure the primer is suitable for use with it.
2. Control the Environment
- Choose the Right Time to Paint: Avoid painting in extreme temperatures or high humidity. The ideal temperature for painting is between 50°F and 85°F (10°C and 29°C), and the humidity should be below 80%. Check the weather forecast before you start painting to ensure the conditions are right.
- Use a Dehumidifier: If the humidity in your home is high, consider using a dehumidifier to reduce it. This will help the paint dry properly and prevent cracking. You can run the dehumidifier in the room where you're painting for a few hours before and during the painting process.
3. Correct Paint Application
- Follow the Manufacturer's Instructions: Read the instructions on the paint can carefully. They will tell you how to apply the paint, how many coats to apply, and the recommended drying time between coats. Make sure to follow these instructions to the letter.
- Apply Thin Coats: Instead of applying one thick coat of paint, apply several thin coats. This allows the paint to dry evenly and reduces the risk of cracking. Let each coat dry completely before applying the next one.
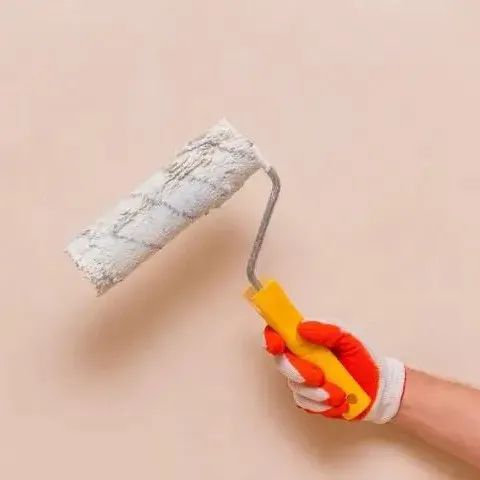
- Use the Right Tools: Use high - quality brushes, rollers, or sprayers for applying the paint. A good brush or roller will help you apply the paint smoothly and evenly. If you're using a sprayer, make sure to adjust the settings correctly to avoid over - spraying.
4. Choose the Right Paint
- Select High - Quality Paint: Invest in a good quality indoor waterproof paint. Cheaper paints may be more prone to cracking and may not provide the same level of protection. Look for paints that are specifically designed for indoor use and have good reviews.
- Consider the Type of Paint: There are different types of indoor waterproof paints available, such as Paint To Stop Water Leaks and Water Repellent Paint for Walls. Choose the type that is most suitable for your needs. For example, if you have a problem with water leaks, a paint to stop water leaks would be a good choice.
What to Do if You Notice Cracks
If you do notice cracks in your indoor waterproof paint, don't panic. You can usually fix them. First, clean the area around the cracks and sand them lightly to smooth the edges. Then, apply a small amount of paint to fill in the cracks. Let it dry and then apply a second coat if necessary. If the cracks are severe, you may need to scrape off the cracked paint and start the painting process over again.
Conclusion
Preventing cracking of indoor waterproof paint is all about proper preparation, correct application, and choosing the right paint. By following these tips, you can ensure that your indoor waterproof paint looks great and lasts for a long time.
If you're in the market for high - quality indoor waterproof paint, we've got you covered. We offer a wide range of products that are designed to prevent water damage and cracking. Whether you need a Polymer Bitumen Membrane, Paint To Stop Water Leaks, or Water Repellent Paint for Walls, we have the perfect solution for you. Contact us today to discuss your requirements and start your next waterproofing project with confidence!

References
- "Painting 101: Tips for a Professional Finish." DIY Home Improvement Magazine.
- "Understanding Waterproof Paints: Types and Applications." Building Materials Journal.


